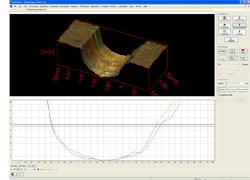
Materials microscope users already benefiting from faster, easier-to-use and intelligent microscope control and image evaluation with the recent launch of the Carl Zeiss AxioVision 4.7 image analysis software can now profit from improved surface roughness and height measurements with an enhanced Topography module.

For users of stereomicroscopes, new functions simplify and improve the microscopic measurement of surface roughness and the heights of microstructures, resulting in unsurpassed, detailed images. The roughness values from unfiltered primary profiles, highpass-filtered roughness profiles and lowpass-filtered waviness profiles can now be determined and an unlimited number of profile lines can be drawn and compared in the image.
In addition to roughness measurements, height measurements have also been optimized. For the first time users may specify the cut-off wavelength for Gaussian filtering of the calculated height chart. A motorized focus system is no longer required as height images of stereo image pairs of an object can now be calculated on the stereomicroscope, using a dual phototube and two cameras.
Carl Zeiss’ suggested stereomicroscope system for comprehensive height measurements is the SteREO Discovery.V8 with dual phototube S, two AxioCam ICc1 digital microscope cameras, the image analysis mini workstation, plus AxioVision 4.7 with the optional AxioVision ‘Topography module’. Other refinements in AxioVision 4.7 include the new ‘Fast MosaiX’ module, which can scan large surfaces up to ten times faster than current solutions, the measurement, segmentation and further processing of 3D objects by the ‘3D measurement’ module and the ‘Comparative diagrams’ module, all of which serve to help in the assessment of materials. Reporting is fast and easy with a diagram view for data lists that enables simple preparation of bar and pie charts as well as scatter plots and the ability to export reports into the Microsoft Word-compatible RTF format.