Scanning electron microscopes are great tools for 2D inspection and metrology of a wide variety of samples. However, their 3D capabilities are still very limited, especially when it comes to quantitative surface characterization. This is the main problem tackled by 3DSM.
3DSM is a PC-based application capable of providing topographical information for samples examined with Carl Zeiss NTS electron microscopes equipped with an AsB® or 4QBSD detector. The application can perform a 3D surface reconstruction based on the individual AsB®/ 4QBSD segment signals, and visualize the resulting 3D model in several different ways. 3DSM can work together with SmartSEM® in the live mode, for real-time 3D imaging. It may also operate in the stand-alone mode for visualizing archived project files.
Advantages of 3DSM
3DSM takes advantage of the possibility of using a single point of view, scanned using four detector segment signals. This method, called the multi-detector method, utilizes the principle of "shape from shading". Using four input images, the gradation of grey-levels on topographical objects is the basis for calculating local surface geometry. This leads to a continuous surface model and resulting measurement capabilities.
The algorithm underlying 3DSM has several advantages over classical 3D surface reconstruction methods based on 2 viewpoints:
- Real-time operation (Live mode)
- Fast reconstruction time (< 1 second)
- Full automation
- No additional hardware necessary (e.g. stage)
- High resolution performance
- Compatibility with any type of 4-quadrant diode or 4-detector system
- Works for smooth surfaces lacking distinguishable details
Applications of 3DSM
3DSM has a vast scope of applications. Almost everything examined so far in a SEM, now gains a third dimension, creating endless possibilities in fields like biology or machining quality control. The main application fields are listed below:
- Life Science
- Electronics
- Forensics
- Industry
3DSM in Life Science
The applications of 3DSM in life science include:
- Cellular & tissue biology
- Particle surface and volume analysis
3DSM in Electronics
The applications of 3DSM in electronics include:
- Defect & failure analysis
- Feedback metrology for lithography and FIB systems
- Nano-imprint analysis & recognition
3DSM in Forensics
The applications of 3DSM in forensics include:
- Bullet & firearm analysis
- Evidence characterisation at the nano-scale
3DSM in Industry
The applications of 3DSM in industry include:
- Roughness measurements
- Wear analysis
Launching The 3DSM Software
When launched for the first time, 3DSM will display the Home screen, with a list of example project files.ality control in machining
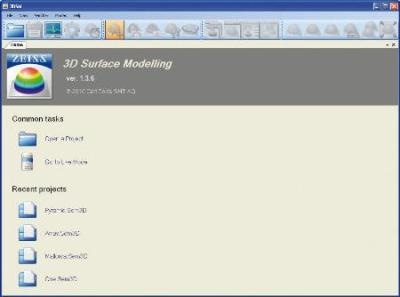
3DSM Home screen.
A single-click on the recent project list file will open the project. The following screenshots use the Pyramid sample project to explain the basic features of the interface.
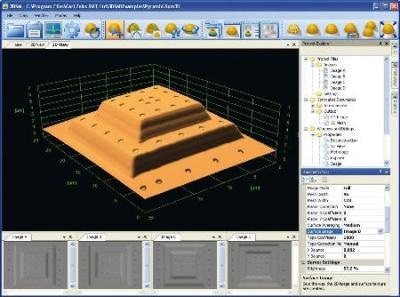
View of 3DSM after loading a project.
By default, 3DSM displays the main 3D View of the object, along with the four input images (bottom), and basic reconstruction parameters grouped in tabs (right). Use the mouse to navigate around the application and explore the resulting images. The mouse will allow rotating, zooming, and panning of the surface mesh and the 2D images. A context menu is always available with a right-click, showing the most common options.
The Interface Appearance of 3DSM
The appearance of the 3DSM interface is designed using a very flexible docking-window technology. This feature allows the user to construct virtually any application layout. Each window may be docked within any of the other document windows or to any of the four side panels. The most commonly used layouts are available at a single mouse click from the toolbar, as shown on the images below.
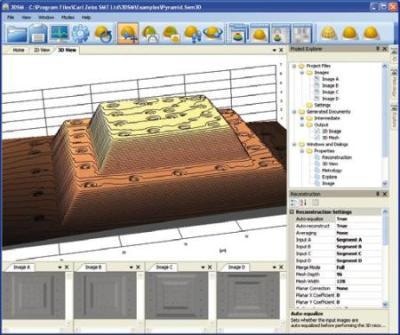
Standard view.
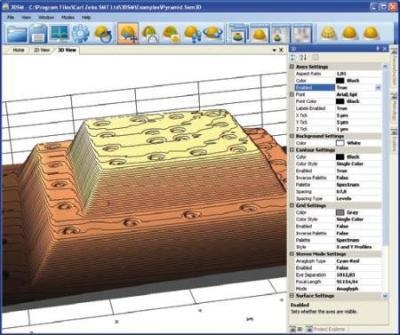
3D view layout.
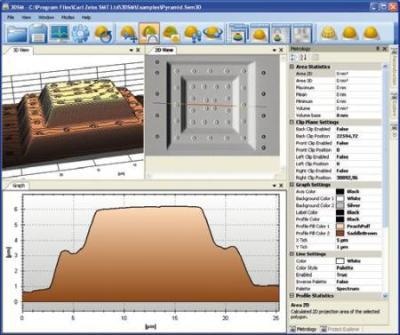
Metrology layout.
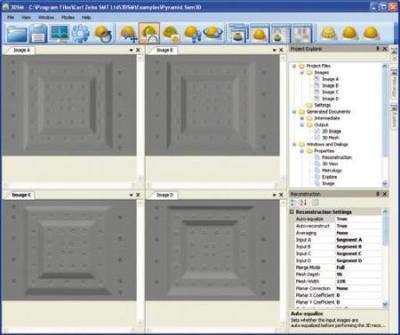
Input image layout. Predefined application layouts available from the toolbar.
The 3D surface may be explored in several ways, ranging from false-color LUTs and texture overlays, to surface-walk and fly-around modes. Some common examples of 3D surface investigation are shown below.
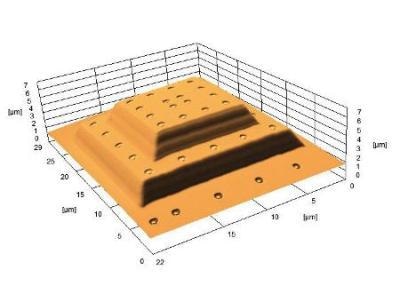
Texture overlay view.
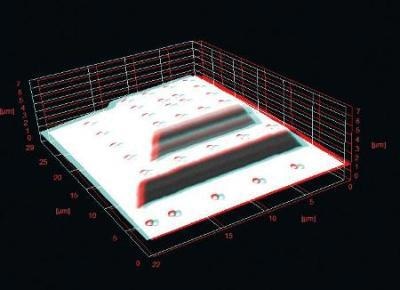
Anaglyph view.
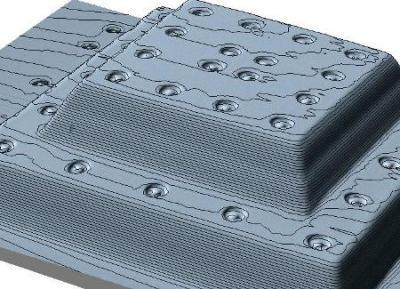
Contour overlay.
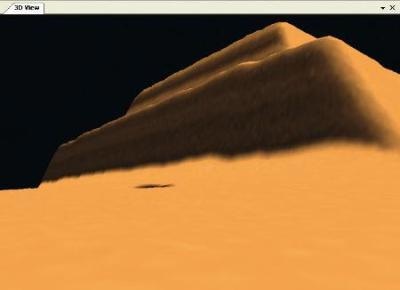
Surface walk mode.
Examples of surface visualization available in 3DSM.
3DSM and Live Mode
Live mode is a special mode, in which 3DSM connects directly with SmartSEM®, the primary control software for NTS SEM microscopes. 3DSM will acquire frames from all four detector quadrants directly, and perform a 3D reconstruction on-the-fly, each time a frame set is completed.
It is advised to operate 3DSM and SmartSEM® in parallel using two monitors or a widescreen monitor. This is because both applications should be visible at once in order to ensure maximum ease of use. An optimal arrangement is to use one monitor for SmartSEM® and the second one for 3DSM.
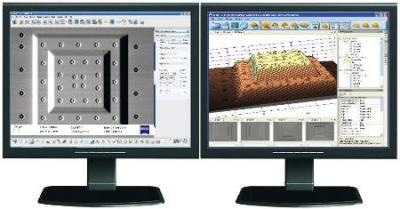
Two monitors are recommended for operating 3DSM in live mode.
Before switching to the live mode, the SEM should be adjusted to display a valid image using backscattered electrons. This requires the use of working distances in the range of 3…15 mm and EHTs ensuring backscattered electron detection (depends on detector diode type). Switching to the live mode is done by a single mouseclick. 3DSM will adjust the remaining parameters automatically, and update the 3D surface reconstruction after every frameset. Simply lean back and enjoy the show!
Measuring Profiles and Areas Using 3DSM
Once a sample surface has been reconstructed, a variety of measurements can be performed. The simplest form is single-dimension metrology (profile measurement). It is strongly advised to switch to the metrology layout, using the toolbar button, or menu option. Then, mark the start and end points of the profile, and the Graph window will immediately show the cross-section along with measured statistics.
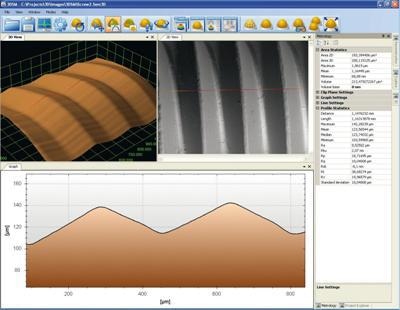
The metrology layout used for measuring the profile of a thread.
3DSM allows the performance of area and volume measurements based on an arbitrarily chosen surface polygon. The polygon may be chosen on the 2D View or 3D View, by interactively defining its vertices.
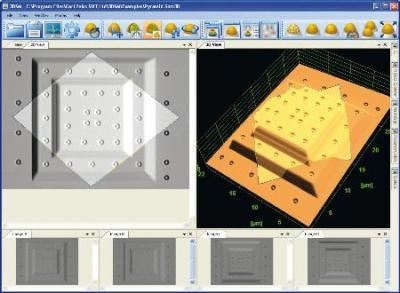
Defining and evaluating area and volume.
On completion, 3DSM will automatically calculate 2D area and 3D volume statistics.
Limitations of 3DSM
The surface reconstruction method underlying 3DSM is the multi-detector method, utilizing the "shape from shading" principle. 3DSM uses gradation of grey-levels on the four input images, for deriving local surface geometry. This leads to a quantitative surface model under the following conditions:
- The input images are free from artefacts such as charging or tunnelling effects
- The input images do not show the shadowing effect
- The sample is a continuous surface, without overlapping objects
From the requirements listed above, the shadowing effect may cause problems on some classes of samples, displaying particularly steep slopes, or vertical features. This means, that the detector segments may not be screened from the flow of electrons by local surface topography.
To avoid the shadowing error, large working distances can be chosen, resulting in a larger backscattered electron acceptance angle. However, some structures with dominating vertical features may not be feasible to reconstruct in a quantitative manner.
The Accuracy of 3DSM
3DSM allows SEM specimen surface reconstruction with a high resolution and accuracy, but only on condition that the input signals contain an undisturbed signal fulfilling backscattered electron distribution. The parameters for the system can be specified as follows:
- Maximum vertical reconstruction error is estimated to be below 10%. This applies only for images without signal artefacts such as shadowing, charging, edge effects, etc.
- Maximum reconstruction angle is dependent on working distance and diode diameter. For working distance 6 mm and diode diameter 10 mm the maximum angle is around 60°. If the slope exceeds this limit, then detector shadowing occurs and the 10 % maximum vertical error cannot be guaranteed.
- Lateral resolution and maximal lateral reconstruction error are limited only by SEM resolution and lateral image error.
- Reconstruction time is estimated to be below 1000ms for acquisition size 1024x768 with surface texture.
Input images from the detector quadrants are the main condition for successful quantitative surface reconstruction. Most artefacts (such as charging) are easy to compensate for through proper sample preparation and using optimal SEM working conditions. The only unavoidable image error is shadowing, occurring for steep specimen slopes. In such cases surface reconstruction and visualization are still possible, but the 10% maximum error constraint cannot be guaranteed. For classes of samples containing steep slopes, 3DSM cannot be considered as a measuring tool.
Surface Roughness Evaluations in 3DSM
Measuring roughness with nanometer precision has never been easier in SEM. Statistical data about the currently selected profile along with roughness evaluation is available in the Metrology properties tab. This information is updated automatically in the live mode after each frame, and when the user interactively changes the selected profile.
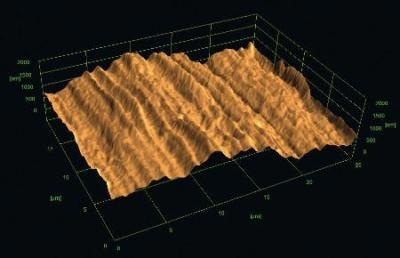
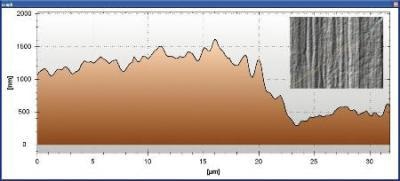
Surface roughness evaluation is a built-in feature in 3DSM.
Analyzing Firing Pin Imprints Using 3DSM
One of many applications of 3DSM is analyzing firing pin imprints left on bullets. The goal is to match the characteristic markings on bullets, to conclude whether they were fired by the same gun, or to pair a gun with a bullet. Until now, this type of research has been performed primarily in 2D. Carl Zeiss NTS scanning electron microscopes together with 3DSM add a whole new dimension to this area. The certainty level of bullet analysis is significantly increasing thanks to the possibility of comparing the imprints in a volumetric manner, rather than only the 2D outline.
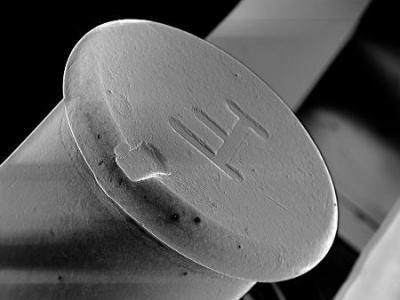
An imprint of the firing pin left on a bullet.
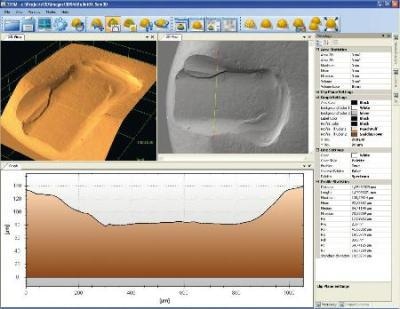
3DSM allows the performance of metrology on the imprint both in 2D, and in 3D, significantly increasing the certainty level of the verdict.
Summary
3DSM adds a whole new level to scanning electron microscopy by allowing samples to be examined in three dimensions almost in real time. There is no further need for complicated stage tilting procedures. Simply find an object of interest, switch to Live mode and enjoy the show!
This information has been sourced, reviewed and adapted from materials provided by Carl Zeiss.
For more information on this source, please visit Carl Zeiss.